Fourth of July is one of my favorite holidays; it’s all about sunshine, fireworks, and of course, desserts that sparkle just as much as the sky! Whether you’re hosting a backyard BBQ or heading to a picnic, these festive 4th of July dessert recipes will be the sweet stars of the show. Think red, white, and blue treats that are as fun to make as they are to eat. Ready to sweeten up your celebration?
4th Of July Dessert Recipes
1. Berry Flag Tart
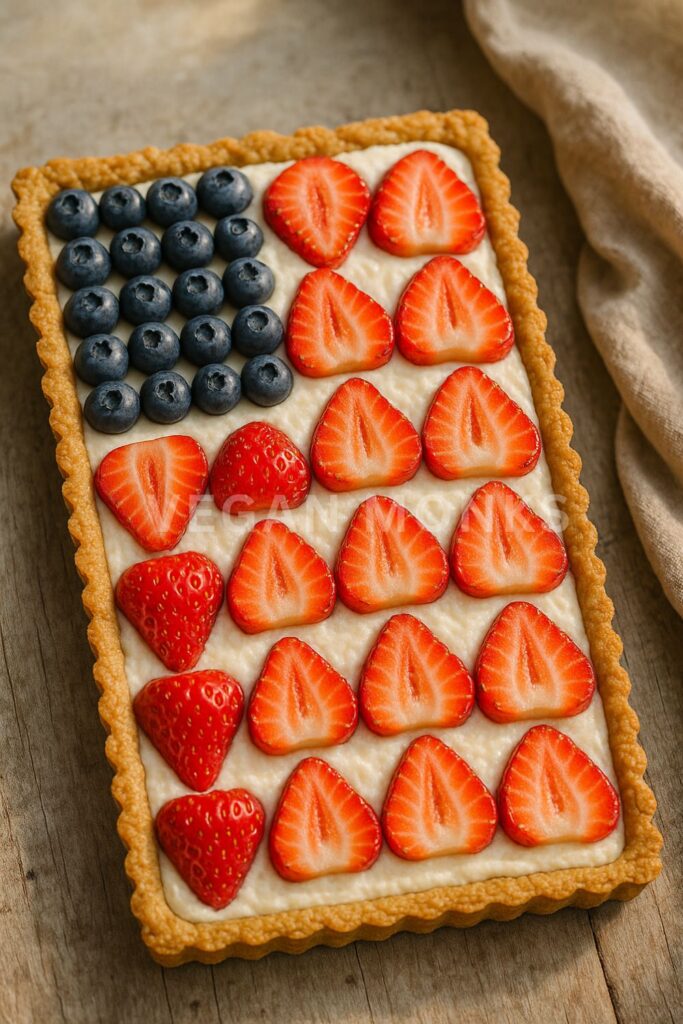
This Vegan Berry Flag Tart is the perfect patriotic dessert to wow your guests on the 4th of July. It features a flaky, golden almond shortbread-style crust, a silky coconut-vanilla cream filling, and vibrant rows of fresh strawberries and blueberries arranged to mimic the American flag. It’s light, refreshing, and totally crowd-friendly — plus, no one will miss the dairy or eggs.
Ingredients
Serves 8–10
For the crust:
- 1½ cups almond flour
- 1 cup all-purpose flour (or gluten-free blend)
- ¼ cup coconut sugar
- ½ teaspoon sea salt
- ½ cup vegan butter, chilled and cubed
- 2 tablespoons almond milk, as needed
For the coconut vanilla cream:
- 1 (13.5 oz) can full-fat coconut milk – chilled overnight
- ½ cup raw cashews, soaked in hot water for 1 hour (or overnight in cool water)
- 3 tablespoons maple syrup
- 1½ teaspoons pure vanilla extract
- 1 tablespoon lemon juice
- Pinch of sea salt
For the flag topping:
- ¾ cup fresh blueberries
- 1 cup fresh strawberries, sliced thin
- Optional: additional raspberries or coconut flakes for extra decoration
Step-by-Step Instructions
Step 1: Prepare the Crust
- Preheat your oven to 350°F (175°C).
- Combine almond flour, all-purpose flour, coconut sugar, and salt in a mixing bowl.
- Add cold vegan butter and use a pastry cutter or your fingers to mix until the mixture is crumbly and holds together when pressed.
- Add almond milk a little at a time until the dough just comes together.
- Press the dough evenly into the bottom and sides of a 9-inch tart pan with a removable bottom.
- Prick the bottom with a fork to prevent bubbling.
- Bake for 15–18 minutes, or until golden brown. Let cool completely.
Pro Tip: Make the crust a day ahead and store it covered at room temperature to save time on the holiday.
Step 2: Make the Coconut Vanilla Cream
- Drain the soaked cashews and add them to a high-speed blender.
- Scoop out the solid coconut cream from the top of the chilled can (leave the watery part behind) and add it to the blender.
- Add maple syrup, vanilla, lemon juice, and a pinch of salt.
- Blend on high until completely smooth and creamy, scraping down the sides as needed.
Texture Tip: If it’s too thick, add a teaspoon or two of the reserved coconut water.
- Chill the cream for at least 1 hour before assembling to help it firm up.
Step 3: Assemble the Tart
- Once the crust is cool and the cream is chilled, spread the coconut vanilla cream evenly into the crust using a silicone spatula or offset knife.
- Use the blueberries to create a square of “stars” in the upper left corner of the tart.
- Arrange sliced strawberries in horizontal rows across the rest of the tart to form “stripes.”
You can also use raspberries or alternate rows of strawberries and raspberries for visual interest.
Step 4: Chill and Serve
- Place the assembled tart in the fridge for 30–60 minutes to help set the cream and make slicing easier.
- Just before serving, optionally sprinkle with unsweetened shredded coconut for a festive white detail.
- Carefully remove the tart from the pan, slice, and serve chilled.
It’s fresh, fun, and guaranteed to get compliments at your 4th of July gathering!
Why This Recipe Is Loved
- Visually stunning and Instagram-worthy
- Made with wholesome, vegan ingredients
- A balance of sweet, creamy, and tart
- No refined sugar and easily gluten-free
- Keeps well in the fridge and can be prepped in parts ahead of time
Pro Tips
- Use a tart pan with a removable bottom for easy, clean presentation.
- Chill the coconut milk overnight for the best cream separation.
- For a nut-free version, skip the cashews and use only thick coconut cream, though it’ll be a bit softer.
- Add a pinch of cardamom or lemon zest to the cream for a flavor boost.
- This dessert holds up well for several hours at room temperature, but store leftovers in the fridge.
2. Red, White & Blueberry Popsicles
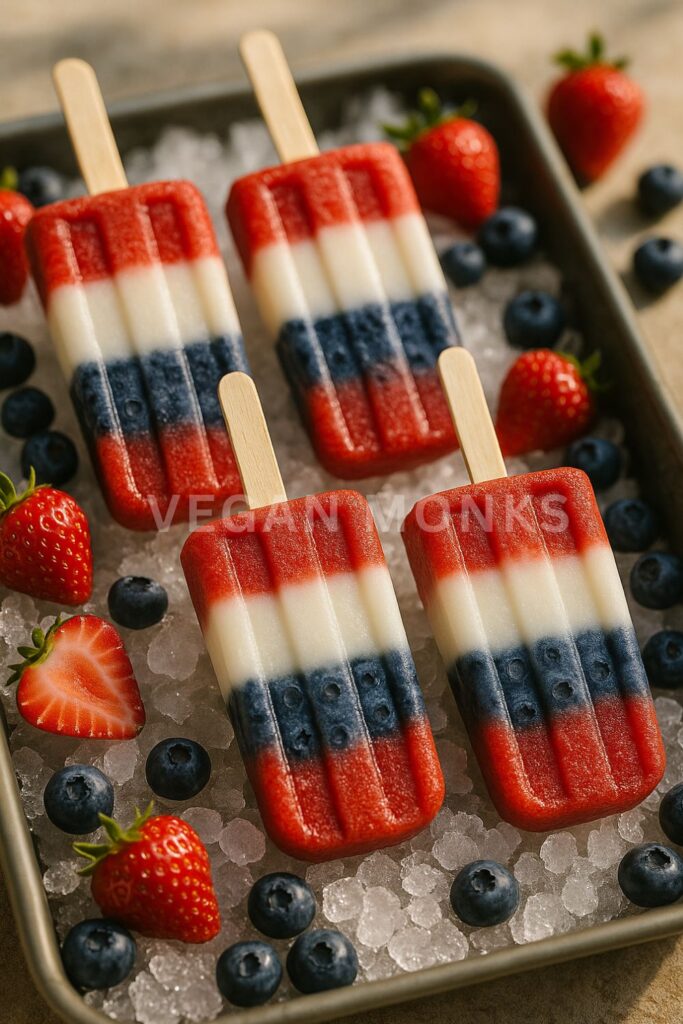
These Red, White & Blueberry Popsicles are the ultimate patriotic treat — chilled, colorful, and made with just a few wholesome ingredients. Each layer features real fruit and dairy-free coconut milk for a creamy, sweet finish. They’re kid-friendly, adult-approved, and perfect for cooling off on a hot July day.
Ingredients
Makes 6–8 popsicles (depending on mold size)
For the red layer:
- 1 cup fresh or frozen strawberries, hulled
- 1 tablespoon maple syrup (optional, adjust to the sweetness of the berries)
- 1–2 tablespoons water, for blending
For the white layer:
- ¾ cup full-fat coconut milk (the thick kind from a can)
- 1 tablespoon maple syrup
- ½ teaspoon vanilla extract
For the blue layer:
- ¾ cup fresh or frozen blueberries
- 1 tablespoon maple syrup
- 1–2 tablespoons water, for blending
Step-by-Step Instructions
Step 1: Make the Red Layer (Strawberry)
- Add the strawberries, maple syrup, and a splash of water to a blender.
- Blend until smooth. The consistency should be pourable but not watery.
- Pour the red mixture about ⅓ of the way up into each popsicle mold.
- Tap the mold gently on the counter to level the layer.
- Place in the freezer for 30–45 minutes, or until slightly firm.
Step 2: Make the White Layer (Coconut-Vanilla)
- While the red layer sets, mix the coconut milk, maple syrup, and vanilla in a small bowl until smooth.
- Once the red layer is semi-firm, gently pour or spoon the white layer over it.
- Again, fill about ⅓ of the mold, tap to smooth, and freeze for another 30–45 minutes.
Pro Tip: Use the back of a spoon or piping bag to help layer the mixture gently and keep the colors defined.
Step 3: Make the Blue Layer (Blueberry)
- Blend the blueberries, maple syrup, and a little water until smooth.
- Once the white layer is semi-set, pour the blueberry mixture to fill the final third of the molds.
- Insert popsicle sticks and place the mold in the freezer for at least 4–6 hours, or overnight for best results.
Step 4: Unmold and Serve
- To release the popsicles, run the molds under warm water for 10–15 seconds and gently pull out the pops.
- Serve immediately or store in a sealed container in the freezer for up to 2 weeks.
Why This Recipe Is Loved
- No artificial colors or added dyes — just real fruit
- Refreshingly light, fruity, and creamy
- Fun for kids and adults alike
- Make-ahead friendly and easy to store
- A festive and healthy dessert alternative to sugary treats
Pro Tips for Perfect Pops
- Don’t rush the freezing steps — clean layers depend on firm separation.
- Taste each mixture before freezing — adjust sweetness as needed.
- Use a small measuring cup or squeeze bottle for easier pouring.
- Add a few whole berries or fruit slices into the mold for extra texture and visual appeal.
- For an extra-special touch, dip the tips in melted vegan white chocolate before serving.
Serving Suggestions
These popsicles are ideal for:
- Backyard barbecues and summer picnics
- Post-swim poolside snacks
- 4th of July dessert tables or party trays
- Kids’ birthday parties with a healthy twist
Serve them on a chilled tray of ice, with a sprinkle of fresh berries for a colorful presentation.
3. No-Bake Strawberry Cheesecake Bars
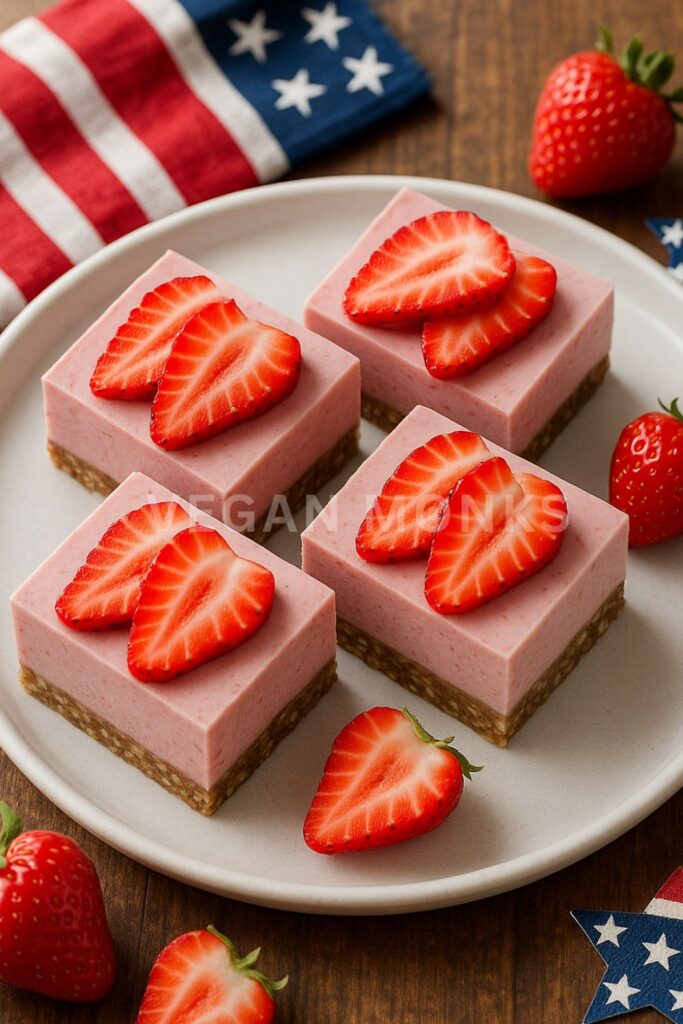
These No-Bake Vegan Strawberry Cheesecake Bars are the kind of dessert you can whip up with minimal effort but maximum flavor. They’re cold, creamy, and bursting with fresh strawberry goodness — the perfect make-ahead dessert for any 4th of July celebration. No dairy, no refined sugar, and no baking required.
Ingredients
Makes 9 bars
For the crust:
- 1 cup raw almonds (or walnuts)
- 1 cup medjool dates, pitted and softened (soak in warm water for 10 minutes if dry)
- ¼ teaspoon sea salt
- ½ teaspoon vanilla extract
For the cheesecake layer:
- 1½ cups raw cashews, soaked in hot water for 1 hour or overnight in cool water
- ½ cup full-fat coconut milk (from a can)
- ⅓ cup maple syrup
- ¼ cup coconut oil, melted
- 2 tablespoons lemon juice
- 1½ teaspoons vanilla extract
- Pinch of sea salt
For the strawberry topping:
- 1½ cups fresh strawberries, hulled and chopped
- 2 tablespoons maple syrup
- 1 tablespoon lemon juice
- Optional: 1 tablespoon chia seeds (for thickening)
Step By Step Instructions:
Step 1: Make the crust
In a food processor, pulse the almonds until finely ground. Add the pitted dates, sea salt, and vanilla extract. Blend until the mixture becomes sticky and holds together when pressed between fingers.
Line an 8×8-inch square pan with parchment paper. Press the crust mixture evenly into the bottom using your hands or the bottom of a glass. Place in the freezer to set while you prepare the filling.
Step 2: Prepare the cheesecake filling
Drain the soaked cashews and add them to a high-speed blender. Add the coconut milk, maple syrup, melted coconut oil, lemon juice, vanilla extract, and a pinch of salt.
Blend on high until the mixture is completely smooth and creamy. Stop to scrape down the sides as needed.
Pour the filling over the chilled crust and smooth out the top with a spatula. Return the pan to the freezer for at least 2 hours to set, or until firm.
Step 3: Make the strawberry topping
In a small saucepan over medium heat, combine chopped strawberries, maple syrup, and lemon juice. Cook for 5–7 minutes, stirring often, until the strawberries break down and the mixture thickens slightly.
For a thicker texture, stir in chia seeds and let the mixture simmer for another 1–2 minutes. Remove from heat and let cool completely.
Step 4: Assemble and chill
Once the cheesecake layer is firm and the topping has cooled, spread the strawberry mixture over the top of the frozen cheesecake.
Place back in the freezer for 30 minutes to firm up the topping, or refrigerate if serving soon.
Step 5: Slice and serve
Lift the cheesecake out of the pan using the parchment paper edges. Slice into 9 even bars using a sharp knife. Wipe the knife clean between cuts for sharp edges.
Serve chilled and garnish with fresh mint leaves, thin strawberry slices, or coconut flakes if desired.
This recipe is a must-make because it’s:
- Completely no-bake — ideal for summer days
- Sweet, tart, and creamy with a nutty base
- Perfect for making ahead — it sets beautifully overnight
- Easy to adapt with blueberries, raspberries, or any seasonal fruit
4. Blueberry Crisp with Oat Streusel
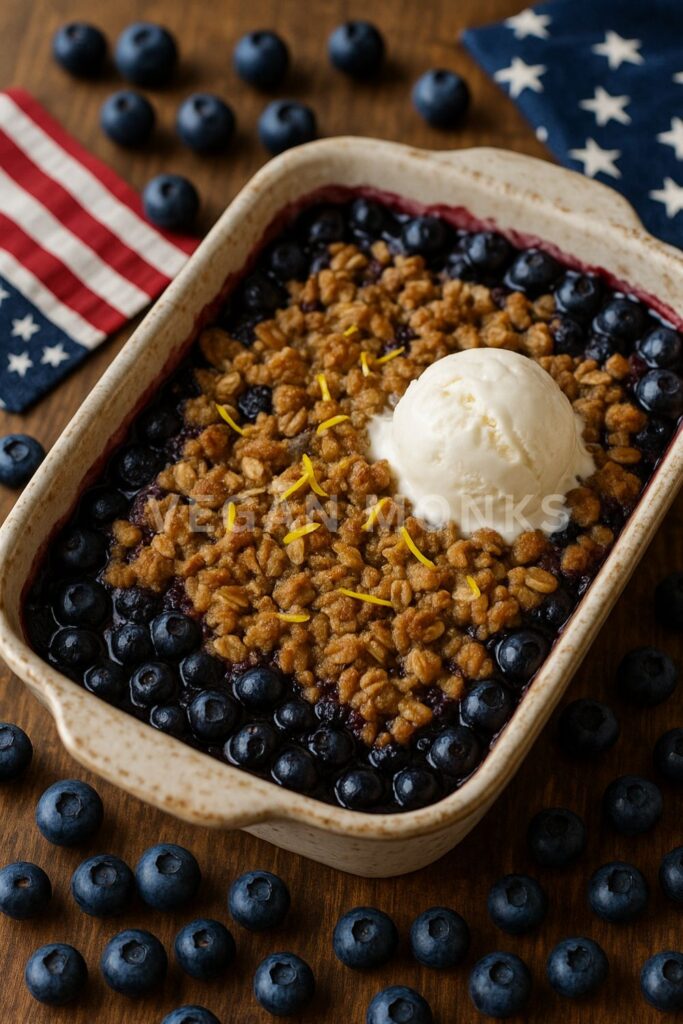
This Blueberry Crisp is a rustic, all-American dessert that fits perfectly on your 4th of July table. Juicy blueberries are tossed with a touch of lemon and maple syrup, then baked under a cinnamon-spiced oat streusel until golden and bubbling. It’s plant-based comfort food at its best — no eggs, no dairy, and completely irresistible.
Ingredients
Serves 6–8
For the blueberry filling:
- 4 cups fresh or frozen blueberries (if frozen, do not thaw)
- 2 tablespoons maple syrup (or agave)
- 1 tablespoon lemon juice
- 1 tablespoon cornstarch or arrowroot powder
- ½ teaspoon vanilla extract
- Pinch of sea salt
For the oat streusel topping:
- ¾ cup rolled oats (use certified gluten-free if needed)
- ½ cup almond flour (or finely ground oats)
- ¼ cup chopped walnuts or pecans (optional)
- ¼ cup coconut sugar or brown sugar
- 1 teaspoon ground cinnamon
- ¼ teaspoon sea salt
- ¼ cup melted coconut oil or vegan butter
- 1 tablespoon maple syrup
Step-by-Step Instructions:
Step 1: Preheat and prep the baking dish
Preheat your oven to 350°F (175°C). Lightly grease an 8×8-inch baking dish or a medium round pie dish with coconut oil or non-stick spray.
Step 2: Make the blueberry filling
In a large mixing bowl, combine:
- Blueberries
- Maple syrup
- Lemon juice
- Cornstarch
- Vanilla extract
- A pinch of salt
Toss gently until the berries are evenly coated and the cornstarch dissolves. Pour the mixture into the prepared baking dish and spread into an even layer.
Step 3: Prepare the oat streusel topping
In another bowl, stir together:
- Rolled oats
- Almond flour
- Coconut sugar
- Cinnamon
- Salt
- Chopped nuts (if using)
Add the melted coconut oil and maple syrup. Mix until the topping resembles coarse, crumbly wet sand and begins to clump together.
Step 4: Assemble and bake
Sprinkle the oat streusel evenly over the blueberry filling, covering as much surface as possible. Don’t press it down — the topping should remain loose and crumbly.
Place the dish in the center of the oven and bake for 35–40 minutes, or until the berries are bubbly and the topping is golden brown.
Step 5: Cool slightly and serve
Let the crisp cool for 10–15 minutes before serving — this helps the filling thicken slightly and prevents burns from piping hot fruit.
Serve warm with a generous scoop of vegan vanilla ice cream, coconut whipped cream, or even a drizzle of plant-based yogurt.
This vegan blueberry crisp is a true summer staple because:
- It’s easy to prepare and oven-to-table ready
- Perfectly sweet with just enough tartness and crunch
- Easily adaptable with blackberries, raspberries, or peaches
- Made from pantry staples and fresh fruit
- Loved by vegans and non-vegans alike — always a crowd-pleaser
5. Mini Fruit Tarts with Almond Crust

These Mini Fruit Tarts are the ultimate 4th of July finger dessert perfectly portioned, vibrant with seasonal fruit, and layered with a silky plant-based custard. The almond crust offers a satisfying crunch, while the pastry cream adds richness without any dairy. Top them with blueberries, raspberries, and sliced strawberries for a naturally patriotic finish.
Ingredients
Makes 8–10 mini tarts (using a standard muffin tin or tartlet molds)
For the almond crust:
- 1½ cups almond flour
- 3 tablespoons coconut oil or vegan butter, melted
- 2 tablespoons maple syrup
- ½ teaspoon vanilla extract
- Pinch of sea salt
For the vegan pastry cream:
- 1 cup unsweetened almond milk (or any plant milk)
- 2 tablespoons cornstarch
- 2 tablespoons maple syrup
- 1 teaspoon vanilla extract
- ¼ teaspoon turmeric (optional, for color)
- Pinch of sea salt
For topping:
- Fresh blueberries
- Sliced strawberries
- Raspberries
- Optional: mint leaves or coconut flakes for garnish
Step-By-Step Instructions:
Step 1: Prepare the crust
Preheat oven to 350°F (175°C). Lightly grease a non-stick muffin tin or mini tart pans.
In a mixing bowl, combine almond flour, melted coconut oil, maple syrup, vanilla extract, and a pinch of sea salt. Stir until the mixture becomes a moist dough.
Scoop about 1½ tablespoons of dough into each muffin cup. Press evenly into the base and up the sides to form small crusts. Prick the bottoms with a fork.
Bake for 10–12 minutes, or until golden brown around the edges. Let them cool completely in the tin before removing.
Tip: To release the crusts easily, run a thin knife around the edges once they’re cool.
Step 2: Make the vegan pastry cream
In a small saucepan, whisk together plant milk and cornstarch until fully dissolved.
Add maple syrup, vanilla, turmeric (if using), and a pinch of salt. Place the saucepan over medium heat, whisking constantly until the mixture thickens — this should take about 4–6 minutes.
Once thickened, remove from heat. Let the pastry cream cool slightly, then transfer to a bowl and cover with plastic wrap pressed directly on the surface to prevent a skin from forming. Chill in the fridge for at least 30 minutes.
Step 3: Assemble the tarts
Once both the crusts and the pastry cream are fully cooled, carefully spoon or pipe the pastry cream into each tart shell.
Smooth the tops with the back of a spoon or offset spatula.
Top each tart with a mix of blueberries, raspberries, and sliced strawberries to create a festive red, white (custard), and blue look.
Step 4: Chill and serve
Refrigerate the assembled tarts for at least 30 minutes to allow them to set and chill through. They can also be made up to a day in advance.
Just before serving, garnish with a fresh mint leaf or a sprinkle of unsweetened coconut for a little flair.
These mini tarts are always a hit because:
- They’re portable, elegant, and naturally festive
- Completely egg-free and dairy-free, yet rich and creamy
- Customizable with different fruit, herbs, or even a chocolate drizzle
- Perfect for make-ahead prep — ideal for hosting and summer potlucks
6. Watermelon Firecracker Slices

These Watermelon Firecracker Slices are the easiest patriotic dessert you’ll ever make — no baking, no blender, just fresh fruit dressed up for the 4th of July. With crisp watermelon wedges dipped in vegan yogurt and coated in shredded coconut or crushed berries, they’re a refreshing, fuss-free dessert that’s just as pretty as it is practical.
Ingredients
Serves 6–8
- 1 medium seedless watermelon
- ¾ cup unsweetened vegan yogurt (coconut, almond, or cashew-based)
- ¼ cup unsweetened shredded coconut
- ¼ cup crushed freeze-dried strawberries or raspberries
- ¼ cup crushed freeze-dried blueberries (optional for blue accent)
- Popsicle sticks or small wooden skewers
- Optional: fresh mint leaves for garnish
Step By Step Instructions
Step 1: Slice the watermelon
Cut the watermelon into round discs, about ¾ to 1 inch thick. Then cut each round into triangles, like pizza slices.
You should get about 6–8 triangles per round, depending on the size of your watermelon.
Carefully insert a popsicle stick or skewer into the rind end of each triangle to create a “popsicle-style” slice. Lay them flat on a baking sheet or cutting board.
Step 2: Prep your toppings
Place the vegan yogurt in a small bowl.
Set up shallow bowls with your toppings: one for shredded coconut, one for crushed freeze-dried strawberries, and one for crushed freeze-dried blueberries (if using).
This creates a fun topping station that’s great for kids to help with, too!
Step 3: Dip and decorate
Take one watermelon slice at a time and dip the tip or edge into the vegan yogurt. Let any excess drip off.
Immediately roll or press the yogurt-covered area into your chosen topping — coconut for a “white” look, freeze-dried berries for a bold red or blue finish.
You can also layer the toppings for a tricolor effect (red, white, and blue) or keep it simple with just one.
Place the finished slices on a parchment-lined tray.
Step 4: Chill and serve
Once all the slices are decorated, transfer the tray to the fridge for 15–30 minutes, or until ready to serve. This helps the yogurt set and makes the slices even more refreshing.
Serve chilled on a platter with extra fresh mint for garnish if desired. These are best enjoyed the same day for maximum crunch and freshness.
This no-fuss dessert is loved because:
- It’s healthy, hydrating, and mess-free
- A perfect make-ahead option that holds well in the fridge
- Great for kids’ hands and ideal for outdoor parties
- Naturally vegan, gluten-free, and allergy-friendly
- Offers a fun alternative to sugary treats without sacrificing the festive feel
7. Flag Sugar Cookies
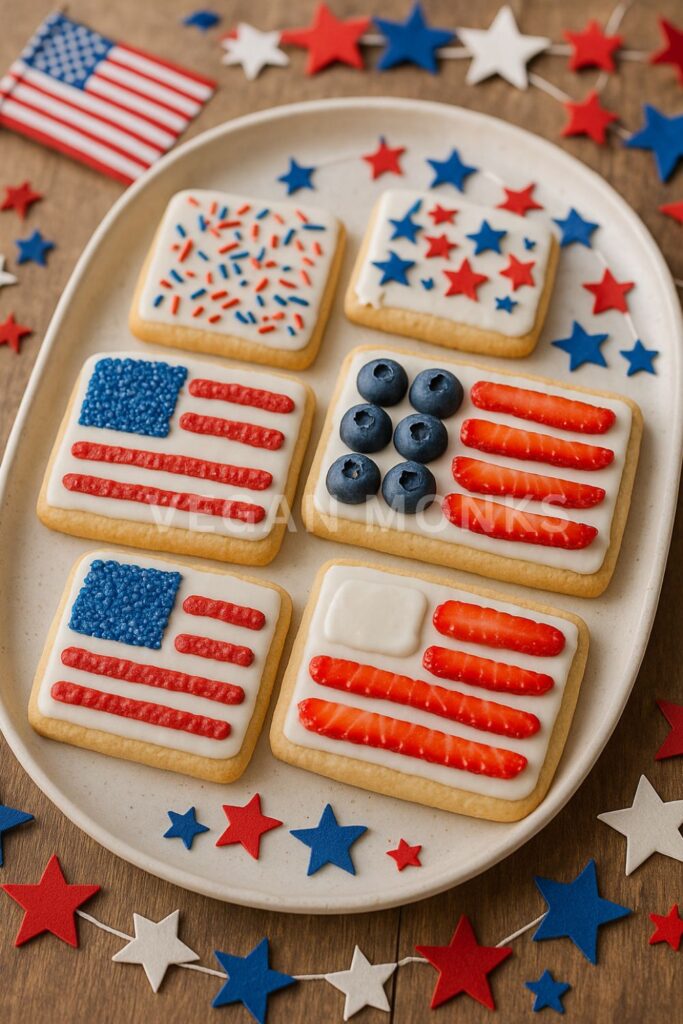
These Flag Sugar Cookies are everything you want in a holiday treat soft, chewy centers with lightly crisp edges, topped with smooth vegan icing and decorated with patriotic flair. Made without eggs or dairy, they hold their shape beautifully and taste just like classic sugar cookies. Perfect for decorating with red, white, and blue toppings to celebrate Independence Day in style.
Ingredients
Makes about 20–24 cookies, depending on size
For the sugar cookie dough:
- 2½ cups all-purpose flour
- 1 teaspoon baking powder
- ¼ teaspoon salt
- ¾ cup vegan butter, softened (not melted)
- ¾ cup organic cane sugar
- ¼ cup unsweetened non-dairy milk (like almond or soy)
- 2 teaspoons vanilla extract
- ½ teaspoon almond extract (optional, for flavor depth)
For the vegan icing:
- 1½ cups powdered sugar
- 1–2 tablespoons plant-based milk
- ½ teaspoon vanilla extract
- Natural food coloring (red and blue)
- Optional: beet powder, spirulina, or freeze-dried fruit powder for natural colors
For decorating:
- Fresh blueberries and sliced strawberries
- Vegan sprinkles (red, white, and blue)
- Small piping bags or toothpicks for detail work
Step By Step Instructions
Step 1: Make the cookie dough
In a large bowl, whisk together the flour, baking powder, and salt. In a separate bowl, cream the softened vegan butter and sugar using a hand mixer or stand mixer until fluffy — about 2 minutes.
Add the plant-based milk, vanilla extract, and almond extract if using. Mix until smooth.
Gradually add the dry ingredients to the wet mixture. Mix until a soft dough forms — it should be slightly tacky but not sticky.
Form the dough into a ball, flatten it into a disc, and wrap in plastic wrap. Chill in the refrigerator for 30–45 minutes.
Step 2: Roll and cut the cookies
Preheat your oven to 350°F (175°C). Line a baking sheet with parchment paper.
On a lightly floured surface, roll the chilled dough to about ¼ inch thickness. Use a rectangular cookie cutter (or simply a knife and ruler) to cut out flag-like shapes. You can also use stars or circles for variety.
Place cookies on the prepared sheet, spacing them slightly apart.
Step 3: Bake the cookies
Bake for 8–10 minutes, or until the edges are just beginning to turn golden. The centers should still look slightly soft — they will firm up as they cool.
Let the cookies cool on the sheet for 5 minutes before transferring to a wire rack to cool completely.
Step 4: Prepare the icing
While cookies cool, make the icing by whisking powdered sugar, vanilla extract, and 1 tablespoon plant milk in a small bowl. Add more milk, a few drops at a time, until the icing reaches a spreadable or pipable consistency.
Divide the icing into three bowls and color two of them red and blue using either natural colorings or vegan food dyes. Leave one bowl white.
Step 5: Decorate the cookies
Once the cookies are completely cool, decorate them with the red, white, and blue icing using a piping bag, zip-top bag with the tip cut off, or even a toothpick for detail work.
Create stripes, stars, or “flag” patterns with the icing and top with blueberries and sliced strawberries for a fruity twist.
Let icing set for 20–30 minutes before serving or packing.
These cookies are always a hit because:
- They’re soft, sweet, and easy to shape without eggs
- The dough is sturdy but tender, perfect for decorating
- A great activity for kids and families during the holiday
- Fully customizable — add fruit, sprinkles, or chocolate drizzle
- Easy to store or wrap up as edible gifts
Celebrate with these desserts that bring festive colors and flavors inspired by the holiday. Vegan options let you enjoy classic treats with a fresh twist. These recipes add fun and flavor to your celebrations. These vegan 4th of July desserts prove you can celebrate big without dairy, eggs, or compromise. From frozen treats to festive bakes, each recipe brings color, flavor, and summer joy to your table. They’re fun to make, easy to share, and guaranteed to impress every guest. So go ahead — serve up something sweet, plant-based, and perfectly patriotic.