There is a distinct, almost primal joy in pulling a blistering hot pizza from the oven. The scent of charred dough and sweet tomatoes fills the kitchen, promising a meal of comfort and sophistication.
Authentic Italian pizza is not about an abundance of toppings, but rather the quality of the foundation. It is a study in restraint and balance.
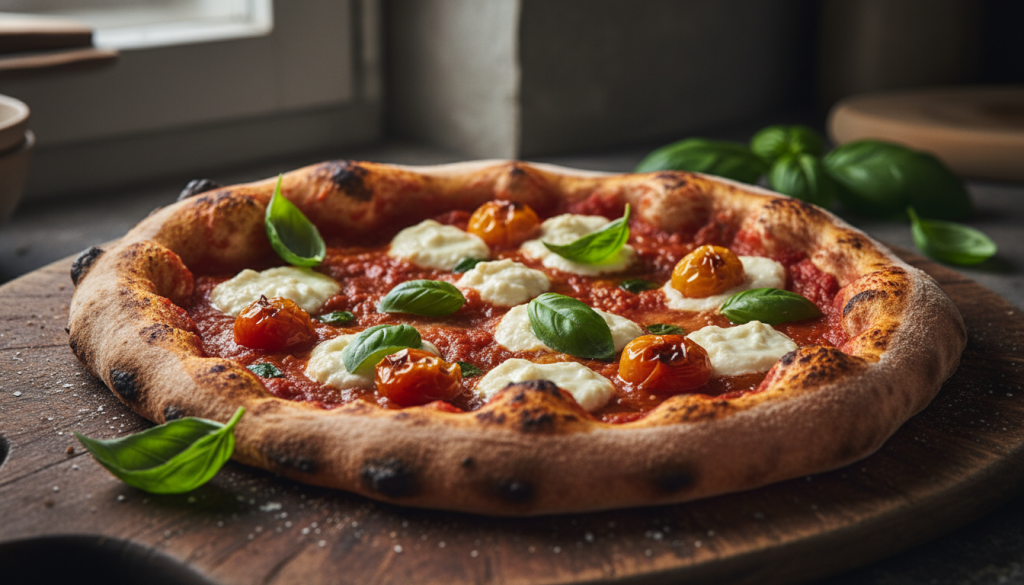
When you strip away the heavy, greasy elements often associated with American takeout, you are left with something pure. The vegetables shine. The olive oil glistens. The crust sings.
This guide will walk you through creating a pizzeria-quality pie at home. We will explore the science of fermentation, the art of sauce making, and the curation of high-end plant-based toppings.
Prepare to elevate your culinary repertoire.
The Soul of the Pizza: The Dough
Everything begins with the crust. Without a spectacular base, even the finest truffles or heirloom tomatoes will fall flat.
Are you intimidated by yeast? You shouldn’t be. It is simply a living organism that needs time and warmth to do its work.
Choosing the Right Flour
The secret to that signature chew lies in the protein content of your flour. Standard all-purpose flour can work in a pinch, but it lacks the necessary strength for a true Neapolitan-style stretch.
You must seek out “Type 00” flour. This Italian-milled flour is finely ground yet high in protein. It creates a dough that is elastic, silky, and capable of forming those beautiful air pockets, or cornicione, in the crust.
Can you mix flours? Absolutely. A blend of Type 00 and a small amount of whole wheat flour adds rustic depth and complexity.
The Importance of Hydration
Hydration refers to the ratio of water to flour in your dough. A higher hydration dough (around 65% to 70%) is stickier but yields a lighter, airier crust.
Low hydration doughs are easier to handle but can result in a dense, cracker-like texture. We want the former. We want a crust that puffs up dramatically in the heat.
Don’t be afraid of sticky dough. Wet hands or a dusting of semolina will help you manage it.
The Fermentation Process
Time is an ingredient. You cannot rush flavor.
While you can make a dough in two hours, a “cold ferment” is the professional secret to success. This involves letting the dough rise in the refrigerator for 24 to 72 hours.
Why wait so long? The yeast consumes the starches more slowly in the cold. This produces complex organic acids and alcohols that give the crust a distinct, savory flavor profile.
Furthermore, the gluten structure relaxes. This makes the dough incredibly extensible and easy to stretch without tearing.
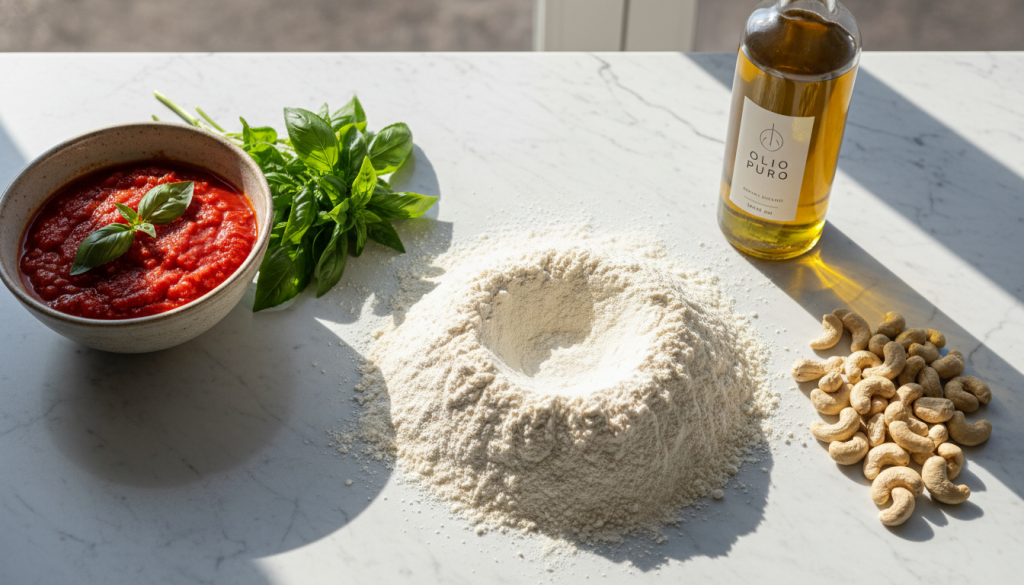
The Sauce: A Lesson in Minimalism
A common mistake is overcooking the tomato sauce before it even hits the pizza. In Naples, the sauce is often just crushed raw tomatoes.
The high heat of the oven cooks the sauce on the pie. This preserves the bright, acidic tang of the fruit.
San Marzano Tomatoes
You must insist on San Marzano tomatoes. Grown in the volcanic soil near Mount Vesuvius, they are prized for their sweetness and low acidity.
Look for the D.O.P. certification on the can. This guarantees their origin and quality.
If you cannot find them, look for high-quality whole peeled plum tomatoes. Do not buy “pizza sauce” loaded with sugar and dried herbs.
Preparing the Marinara
Pour your canned tomatoes into a bowl. Crush them by hand for a rustic texture.
Add a generous pinch of sea salt. Tear in a few leaves of fresh basil. That is it.
Some chefs add a splash of olive oil or a clove of minced garlic. However, keep it simple. The sauce should support the toppings, not overpower them.
The Creamy Element: Artisanal Nut-Based Cheeses
For a truly high-end experience, we move away from processed starch-based shreds. We look to the world of cultured nut cheeses.
Cashews and almonds, when soaked and blended, create a luscious, fatty cream that mimics the mouthfeel of dairy.
Cultured Cashew Mozzarella
This is not a compromise; it is a culinary delight in its own right. Soaked cashews blended with water, tapioca starch, and a probiotic capsule create a base that stretches and melts.
The tapioca starch provides the elasticity. The culturing process provides the tang.
You can drop spoonfuls of this mixture onto the pizza before baking. It will set into creamy pools that contrast beautifully with the crisp crust.
Almond Ricotta
For a different texture, consider an almond ricotta. Blanched almonds are blended with lemon juice, nutritional yeast, and salt until fluffy.
This adds a granular, rich texture similar to traditional ricotta. It pairs exceptionally well with green vegetables like spinach or zucchini.
Dollop it on the pizza after baking for a fresh, cool contrast to the hot dough.
Curating the Toppings: A Symphony of Vegetables
This is where your creativity takes center stage. However, resist the urge to pile on every vegetable in your crisper drawer.
Overloading a pizza prevents the crust from cooking through. It leads to the dreaded “soggy bottom.”
Select two or three star ingredients. Consider their textures and how they interact with heat.
Flavor Profile 1: The Earthy Umami
Mushrooms are the meat of the vegetable world. But don’t just slice raw button mushrooms.
Use a mix of cremini, shiitake, and oyster mushrooms. Sauté them briefly in a pan with garlic and thyme before topping the pizza. This removes excess moisture and concentrates their flavor.
Pair these with caramelized onions. The sweetness of the onions cuts through the earthiness of the fungi. Finish with a drizzle of truffle oil post-bake for pure decadence.
Flavor Profile 2: The Mediterranean Brightness
Think salt, brine, and acid. Kalamata olives, capers, and artichoke hearts form a classic triad.
Use marinated artichoke hearts, but drain them well. Pat them dry with a paper towel.
Add thin slices of red onion for a sharp bite. This combination requires no pre-cooking. The oven will char the onions and warm the olives perfectly.
Flavor Profile 3: The Verde
Green pizzas are visually stunning and incredibly fresh. Start with a base of pesto (made with basil, pine nuts, garlic, and olive oil) instead of tomato sauce.
Top with shaved asparagus ribbons. Use a vegetable peeler to get them paper-thin.
Add zucchini coins and fresh peas. The result is vibrant, light, and perfect for spring.
The Equipment: Recreating the Stone Hearth
You do not need a wood-fired brick oven to make great pizza. However, you do need to understand thermal mass.
Home ovens struggle to retain the intense heat required for that rapid rise. We need to hack the system.
The Pizza Steel or Stone
A baking stone is good; a baking steel is better. Steel conducts heat much faster than ceramic.
Place your steel or stone on the highest rack of your oven. Preheat the oven to its maximum temperature (usually 500°F or 550°F) for at least one hour.
This creates a radiant heat source directly above the pizza while conducting intense heat from below. It mimics the environment of a professional oven.
The Peel
A pizza peel is the shovel-like tool used to transfer the pie. You need two types ideally, but one will suffice.
A wooden peel is best for building the pizza. The dough slides off wood easily.
A metal peel is best for retrieving the pizza. Its thin blade slips under the cooked crust without disturbing toppings.
If you only have one, choose wood. Just ensure it is well-floured to prevent sticking.
Step-by-Step Method: The Art of Assembly
Now that we have our components, it is time to build. This process requires confidence and speed.
Have all your ingredients prepped and within reach. This is your mise en place.
Step 1: Stretching the Dough
Remove your dough ball from the fridge at least two hours before baking. It must be at room temperature to stretch easily.
Dump the dough onto a floured surface. Do not use a rolling pin. Rolling pushes out all the precious gas bubbles we spent days cultivating.
Use your fingertips. Press from the center outwards, leaving a one-inch rim for the crust.
Gently pick up the dough. Let gravity do the work, rotating it like a steering wheel.
Step 2: The Transfer
This is the moment of truth. Transfer the stretched skin to your floured wooden peel.
Give the peel a little shake. Does the dough slide back and forth?
If it sticks, lift the edge and throw more flour or semolina underneath. Do not proceed to toppings until the dough is mobile.
Step 3: Dressing the Pie
Work quickly. The longer the dough sits on the peel, the more likely it is to absorb moisture and stick.
Ladle a small amount of sauce into the center. Spiral it outwards with the back of the spoon.
Add your cashew cheese or almond ricotta. Arrange your chosen vegetables sparingly.
Drizzle with a high-quality extra virgin olive oil. This helps conduct heat to the toppings and adds flavor.
Step 4: The Bake
Open the oven door. Slide the pizza onto the screaming hot steel with a confident, jerking motion.
Close the door immediately. Switch the oven to “Broil” (High) if your heating element is at the top.
Watch it closely. It should take between 5 to 7 minutes.
You want the crust to be puffed and golden. You want charred spots (leopard spotting) on the rim.
Step 5: The Finish
Remove the pizza with your metal peel. Transfer it to a wire rack to cool for one minute.
Why a wire rack? If you put it directly on a plate, the steam will condense and make the crust soggy.
Now is the time for fresh herbs. Basil, arugula, or fresh oregano should always be added post-bake to preserve their delicate oils.
Slice and serve immediately.
Troubleshooting Common Issues
Even the best chefs encounter issues. Here is how to solve them.
The Dough Won’t Stretch
If the dough keeps springing back, the gluten is too tight. It has not relaxed enough.
Cover it with a towel and walk away for ten minutes. Patience is the only cure here.
The Bottom is Pale
Your stone or steel was not hot enough. Preheat longer next time.
Alternatively, place the stone lower in the oven. This puts it closer to the bottom heating element.
The Toppings are Burnt
The oven was too hot on top, or the pizza was too high up. Move the rack down one notch.
Also, ensure delicate vegetables like spinach are placed under the cheese or sauce to protect them.
The Pizza is Watery
You used too much sauce. Or, your vegetables released too much water.
Pre-cook high-moisture vegetables like mushrooms and spinach. Salt your zucchini slices and pat them dry before using.
Advanced Techniques: Elevating the Experience
Once you have mastered the basics, you can experiment with advanced flavor builders. These small touches distinguish a home cook from a culinary artist.
Infused Oils
Don’t just use plain olive oil. Create a garlic confit oil or a chili-infused oil.
Simmer chili flakes in oil over low heat for 20 minutes. Let it cool and strain.
Drizzle this over the finished pizza for a customized heat level. It adds a professional sheen and aroma.
Balsamic Glaze
A reduction of balsamic vinegar adds a sweet, tangy complexity. It pairs beautifully with bitter greens like arugula or radicchio.
Simmer balsamic vinegar until it reduces by half and coats the back of a spoon. Drizzle sparingly.
The “Cornicione” Dip
In Italy, the crust is often used to mop up the remaining sauce or oil. Elevate this by serving a side dip.
A simple emulsion of garlic, lemon, and olive oil works wonders. Or perhaps a spicy marinara for dipping the “bones” of the pizza.
A Note on Ingredients Sourcing
The quality of your pizza is directly tied to the quality of your grocery list. Visit your local farmers market.
Look for seasonal produce. Asparagus in spring, heirloom tomatoes in summer, squash in autumn.
Talk to the growers. Ask what is at peak flavor.
For the pantry staples, invest in the good stuff. A single bottle of premium olive oil will last for many pizzas and makes a noticeable difference.
The Social Aspect of Pizza Making
Pizza is inherently communal. It is food meant to be shared.
I once hosted a dinner party where the kitchen became the stage. Guests stretched their own dough (with varying degrees of success) and chose their toppings.
It breaks down barriers. It encourages conversation.
Prepare your dough balls in advance. Set up a topping station with bowls of vibrant vegetables and sauces.
Pour the wine. Let the flour fly.
Detailed Recipe: The Ultimate Italian Veg Pizza
Here is the culmination of our discussion. This recipe produces two 12-inch pizzas.
Prep time: 30 minutes (plus fermentation time)
Cook time: 12 minutes
Yields: 2 Pizzas
The Dough Ingredients
- 500g Type 00 Flour (or bread flour)
- 325ml Warm Water (approx. 90°F)
- 10g Fine Sea Salt
- 3g Instant Yeast
- 1 tsp Agave Syrup or Organic Sugar (to feed the yeast)
The Sauce Ingredients
- 1 can (28oz) San Marzano Tomatoes (D.O.P.)
- 1 tsp Sea Salt
- Fresh Basil leaves
- 1 tbsp Extra Virgin Olive Oil
The “Cheese” (Cashew Cream)
- 1 cup Raw Cashews (soaked for 4 hours)
- 1/2 cup Water
- 1 tbsp Nutritional Yeast
- 1 tsp Lemon Juice
- 1/2 tsp Salt
The Topping Selection (Suggestion)
- Baby Arugula (fresh)
- Cherry Tomatoes (halved)
- Kalamata Olives (pitted)
- Artichoke Hearts (quartered)
- Truffle Oil (for finishing)
Instructions
1. Activate the Yeast:
In a small bowl, mix the warm water, yeast, and sweetener. Let it sit for 5 minutes until it becomes frothy. If it doesn’t bubble, your yeast is dead; start over.
2. Mix the Dough:
In a large bowl, combine the flour and salt. Create a well in the center. Pour in the yeast mixture.
Mix by hand until a shaggy ball forms. Dump onto a clean surface.
3. Knead and Rest:
Knead the dough for 10 minutes. You are looking for a smooth, elastic texture.
Place the dough in a lightly oiled bowl. Cover with a damp cloth or plastic wrap.
4. The Cold Ferment:
Let the dough rise at room temperature for 1 hour. Then, place the bowl in the refrigerator for at least 24 hours (up to 72 hours).
5. Prep the Components:
On baking day, remove the dough and divide it into two equal balls. Let them rest covered at room temperature for 2 hours.
Blend the soaked cashews, water, nutritional yeast, lemon, and salt until perfectly smooth. Set aside.
Crush the tomatoes by hand and season with salt and olive oil.
6. Heat the Oven:
Place your pizza stone or steel on the top rack. Preheat to 500°F (260°C) for one hour.
7. Assemble:
Stretch one dough ball on a floured surface. Transfer to a wooden peel dusted with semolina.
Spread a thin layer of tomato sauce. Dollop the cashew cream generously. Add cherry tomatoes, olives, and artichokes.
8. Bake:
Slide the pizza onto the stone. Bake for 5-7 minutes. The crust should be charred in spots and the cashew cream should be set and slightly browned.
9. Finish:
Remove from the oven. Immediately top with a handful of fresh arugula. The residual heat will wilt it slightly.
Drizzle with truffle oil. Slice and serve hot.
Why This Method Works
By combining high heat with a cold-fermented dough, we achieve a texture impossible with quick recipes. The crust is digestible and flavorful.
The use of raw cashew cream instead of processed alternatives provides a clean, nutty richness. It complements the vegetables rather than coating the palate in oil.
The focus on fresh, high-quality produce ensures that every bite is vibrant.
Conclusion
Making Italian vegetable pizza at home is a journey of refinement. It is about stripping away the unnecessary and perfecting the essential.
You now possess the knowledge to create a masterpiece. You understand the chemistry of the dough and the philosophy of the sauce.
Do not be discouraged if your first attempt is not perfectly round. The rustic shape is the signature of the artisan.
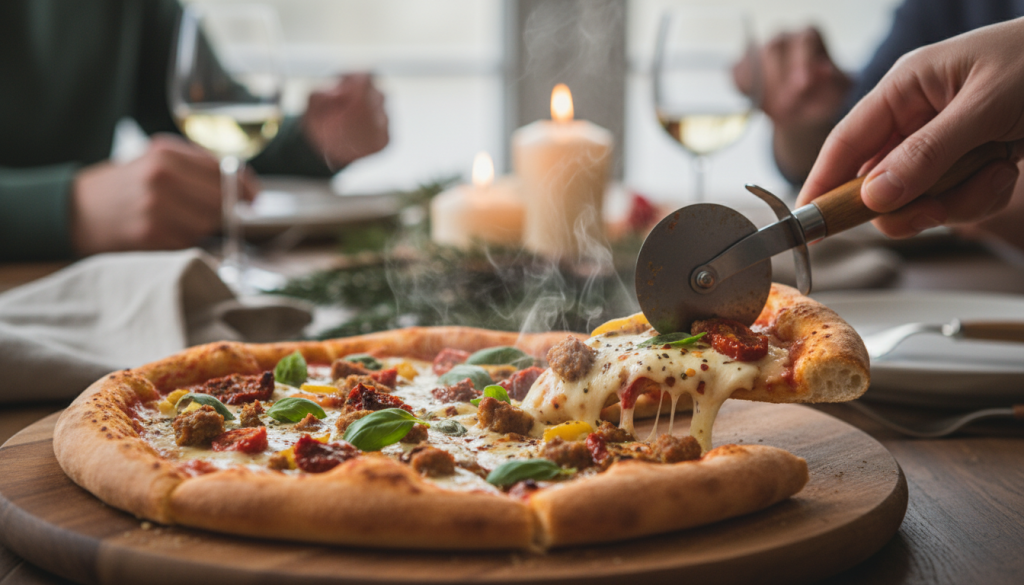
Invite friends over. Open a bottle of Chianti or a crisp Pinot Grigio.
Celebrate the ingredients. Celebrate the process.
The best pizza in town is now coming out of your oven. Are you ready to bake?